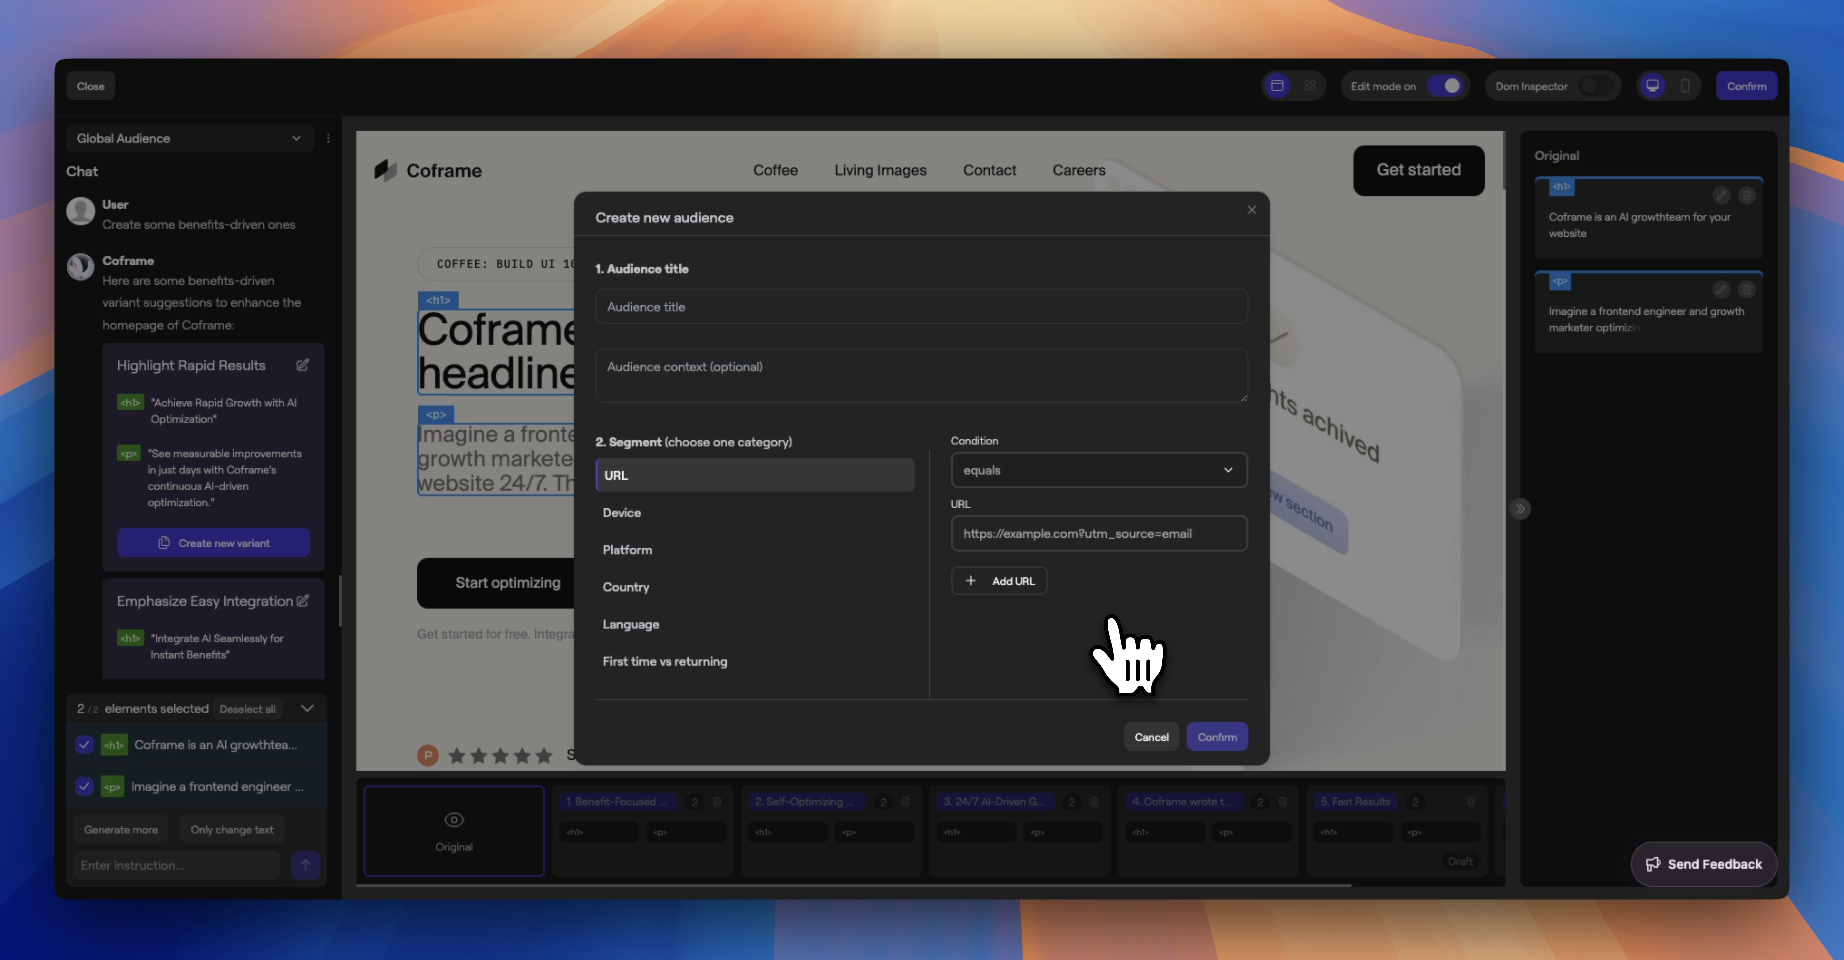
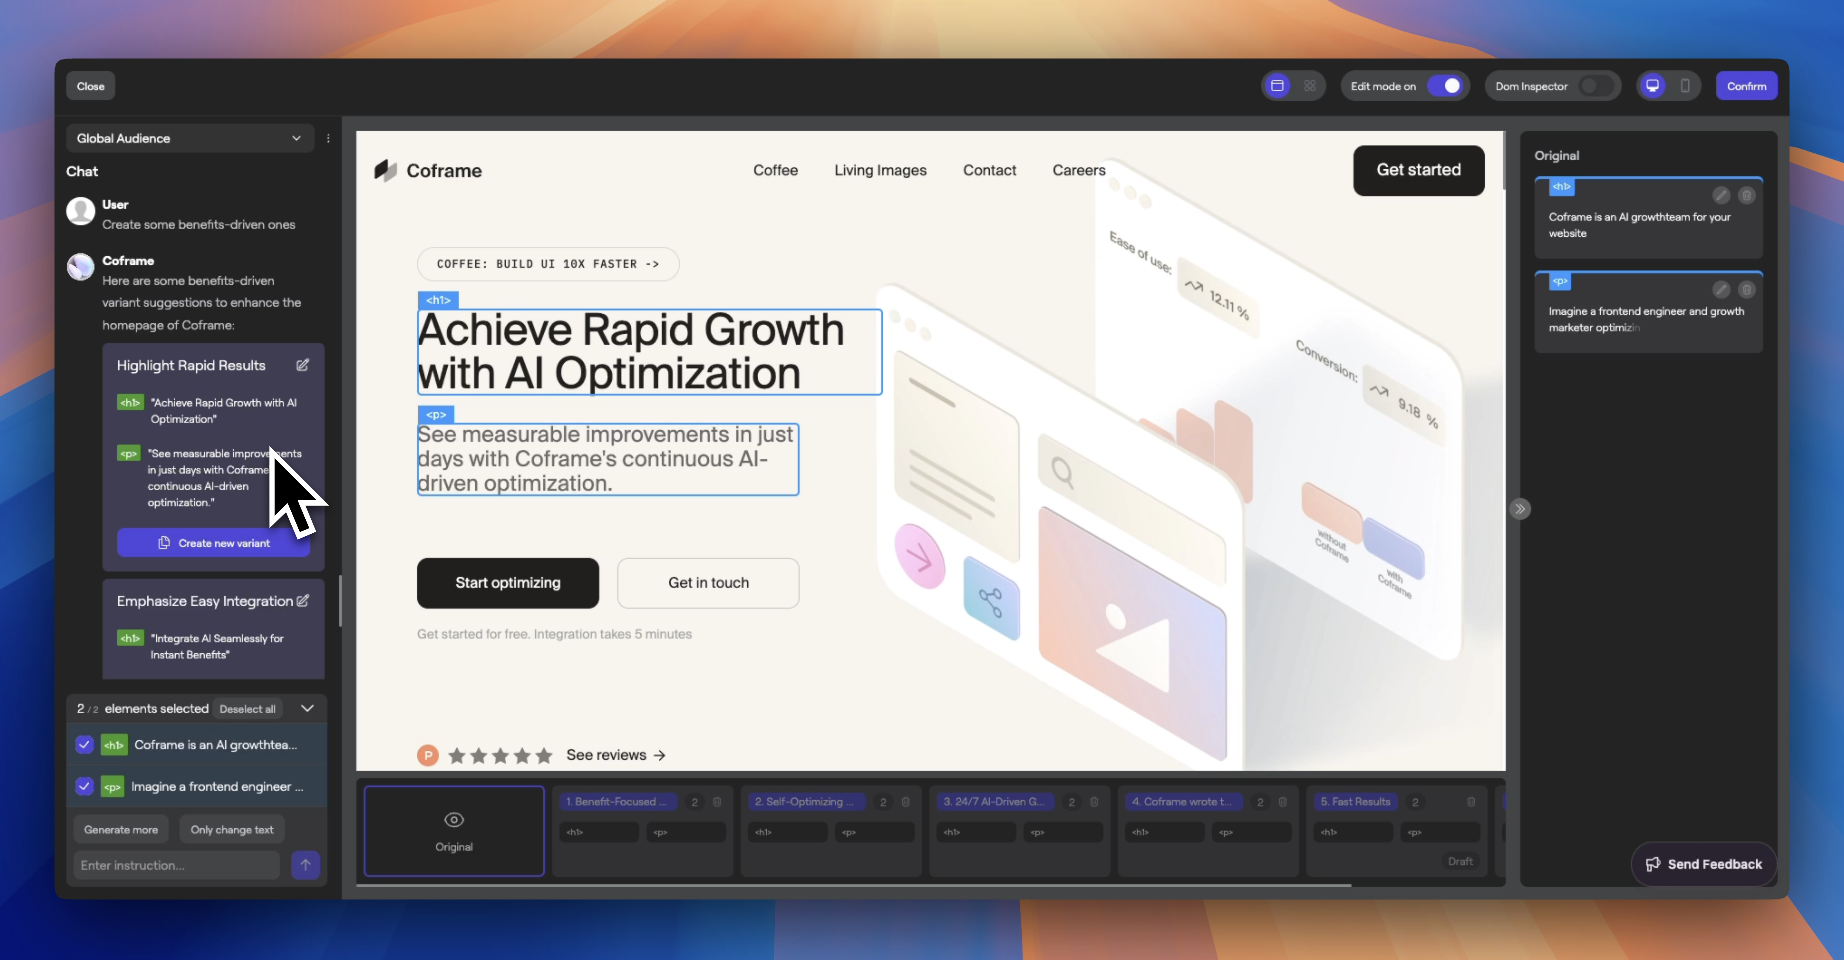
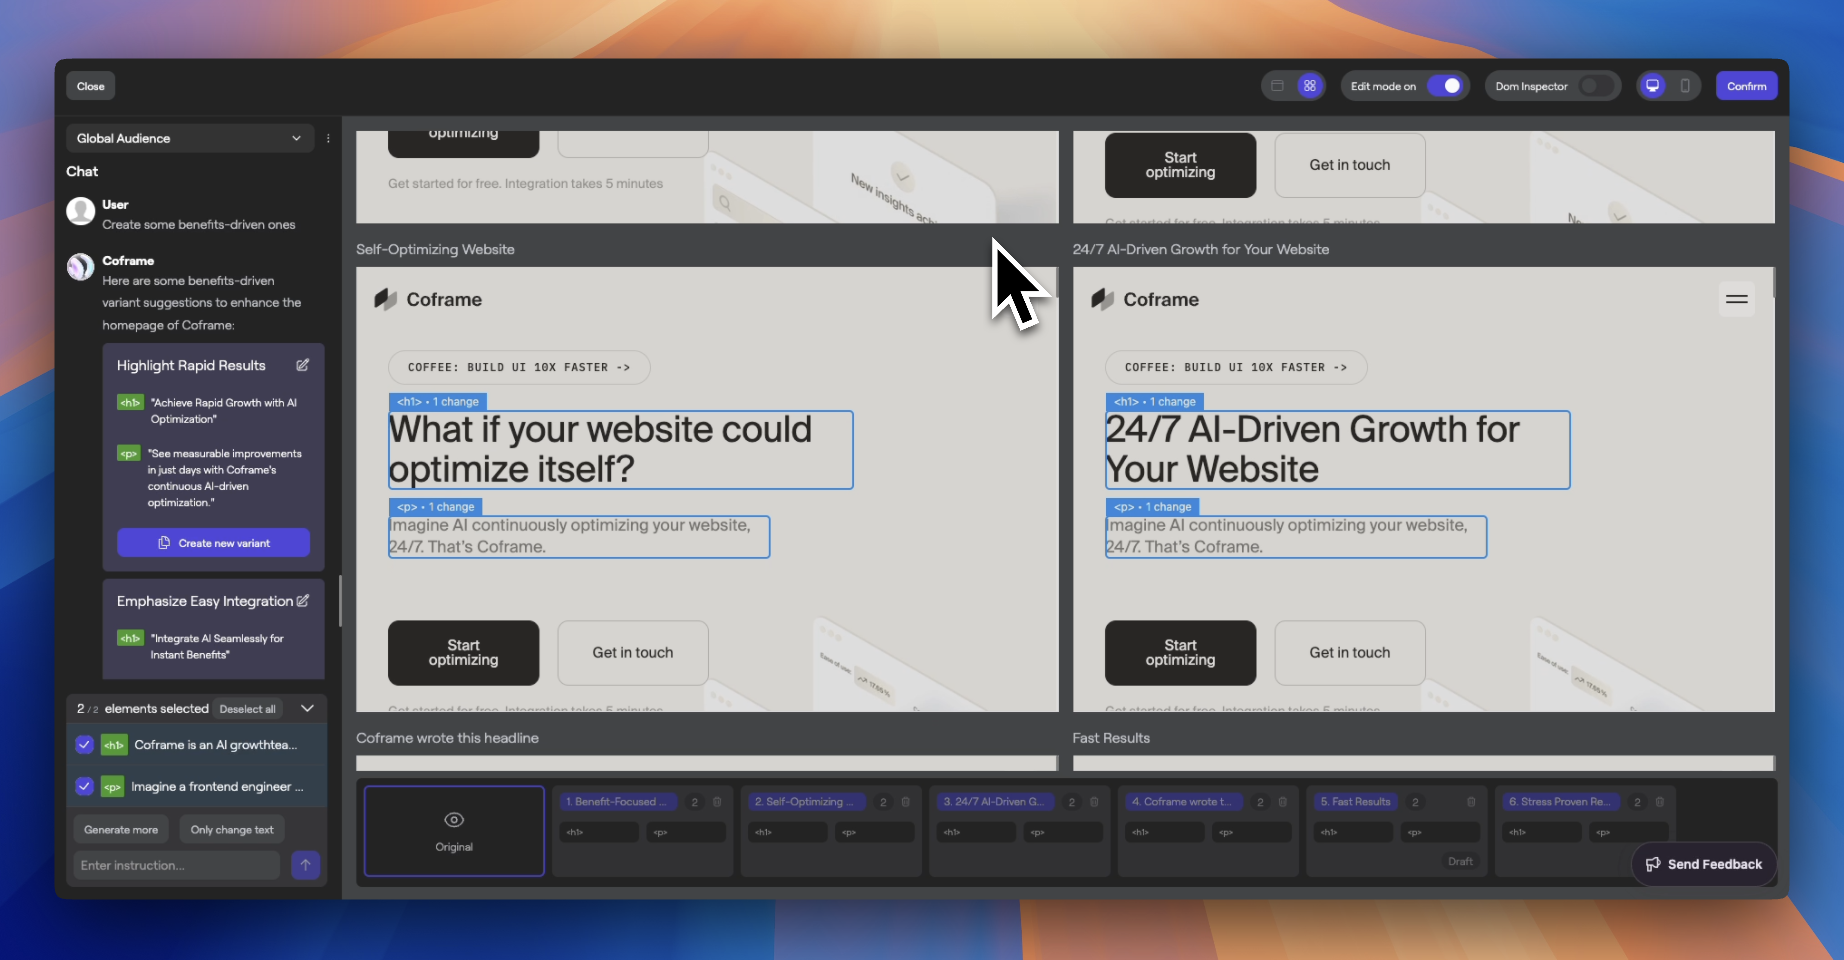
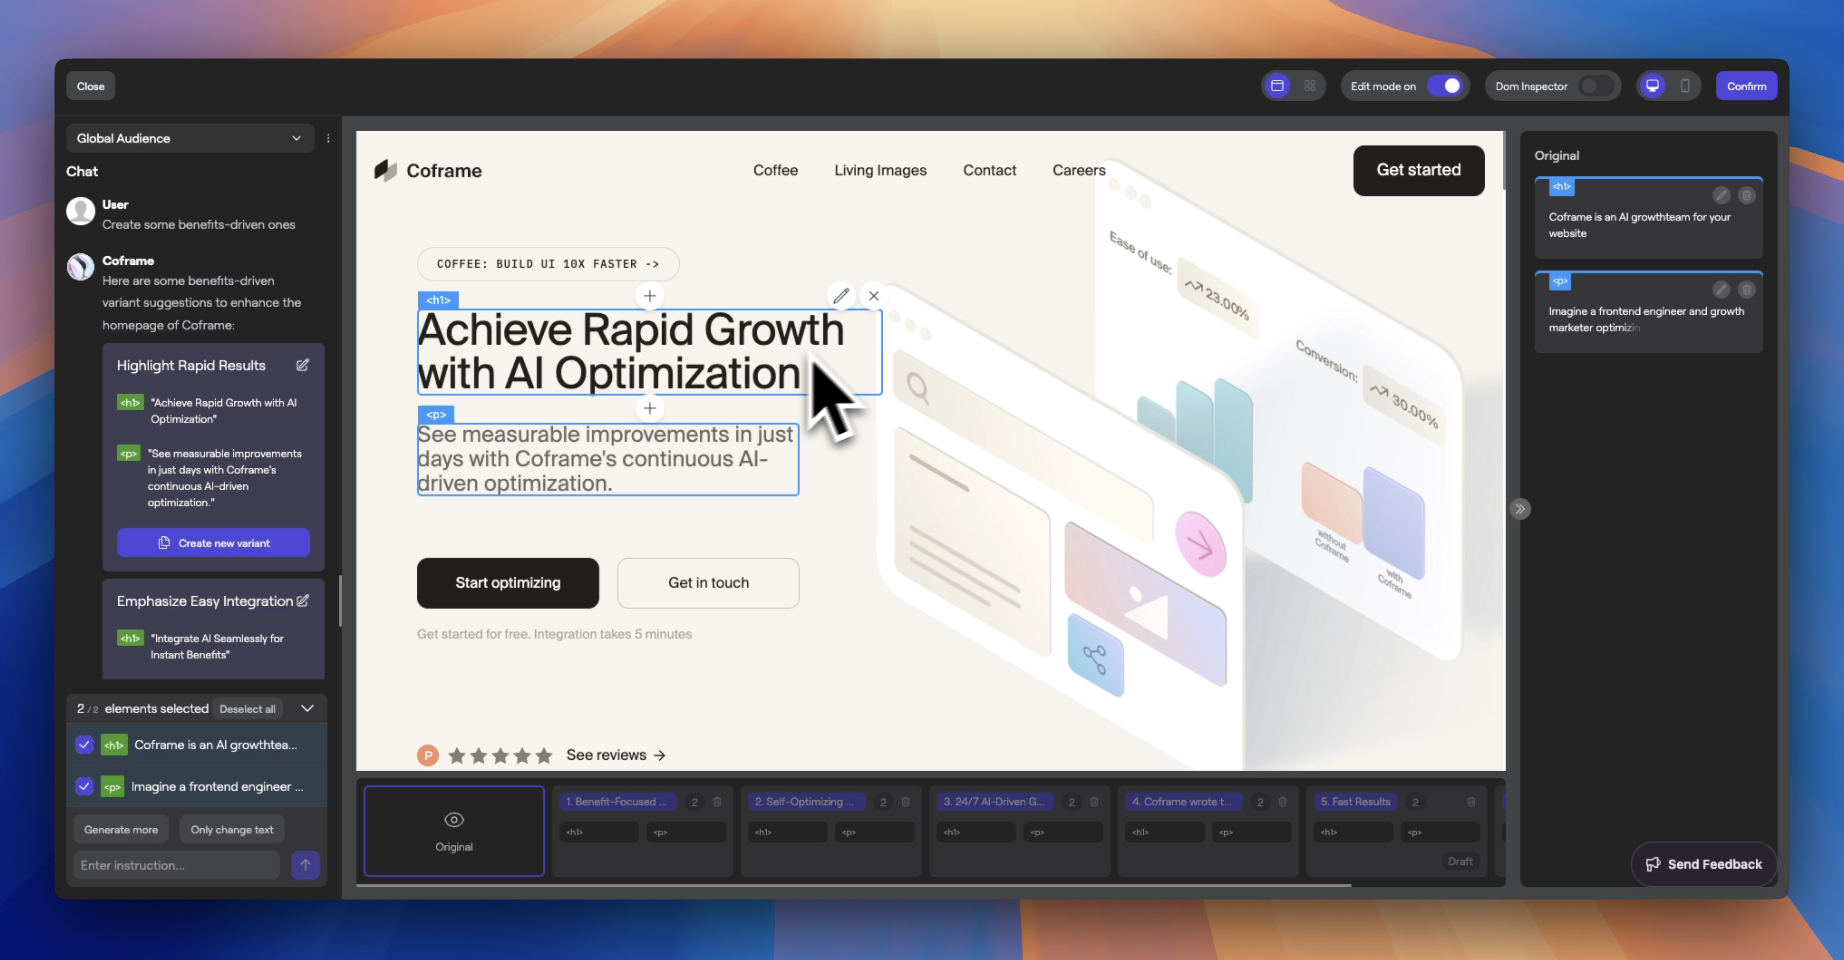
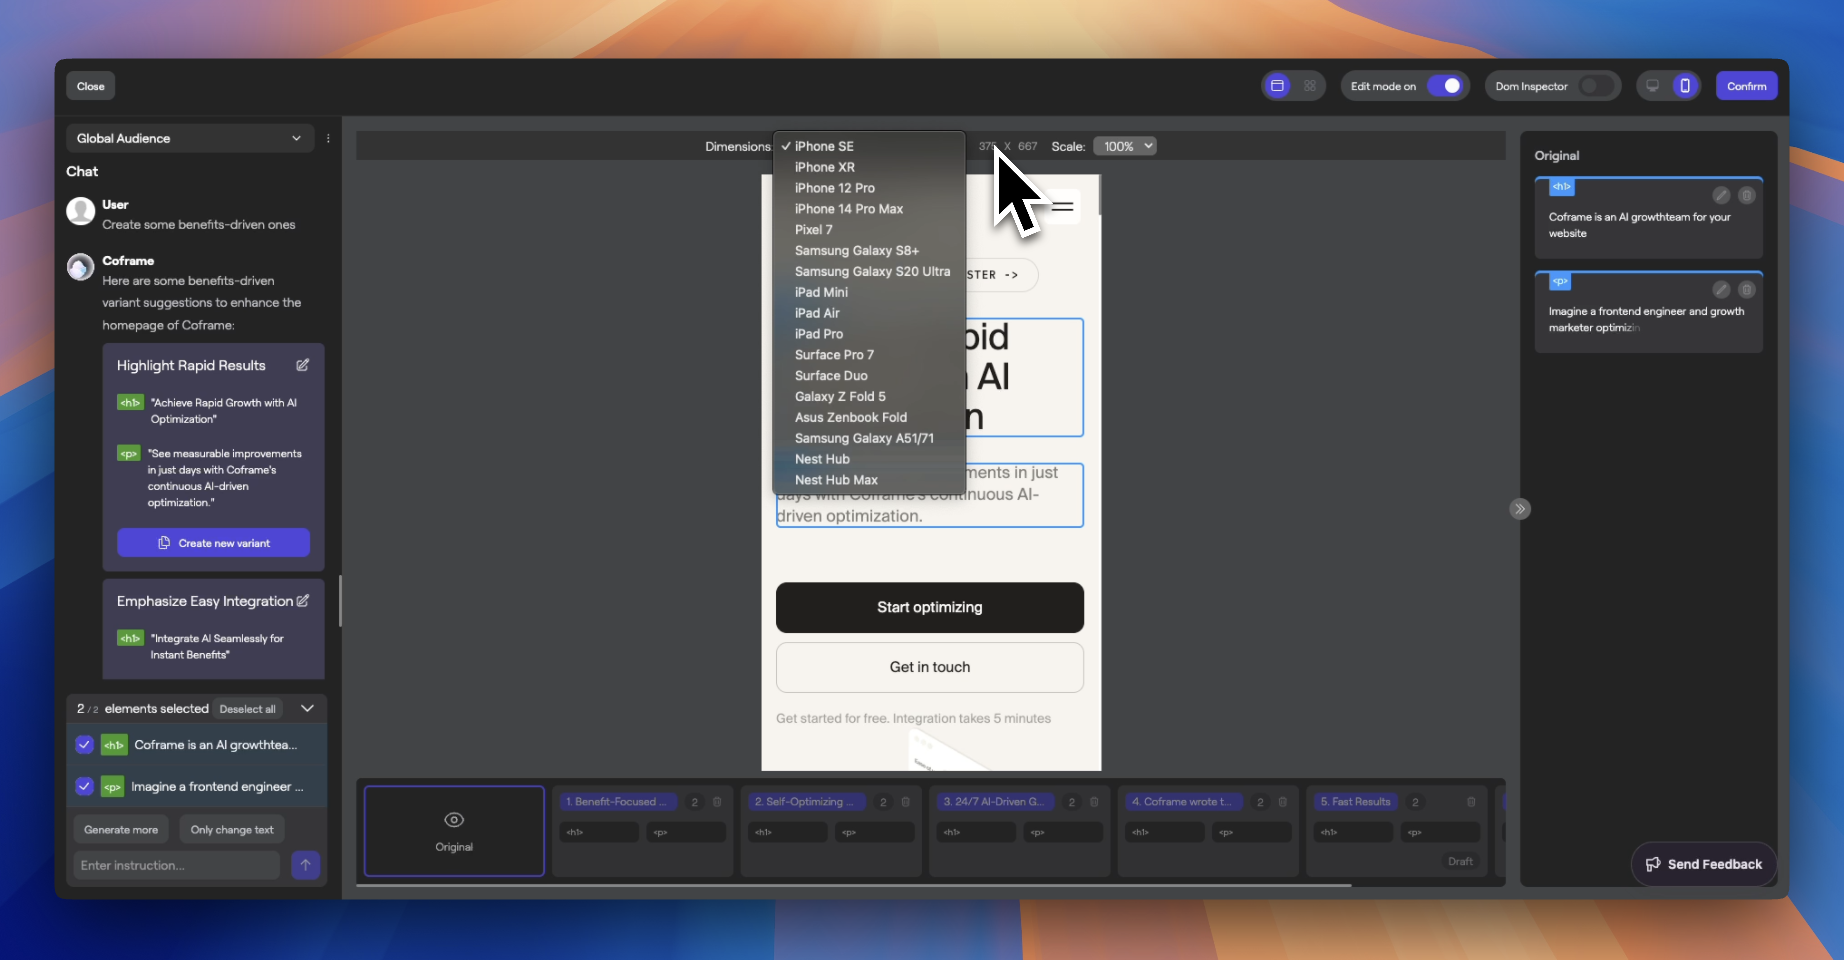
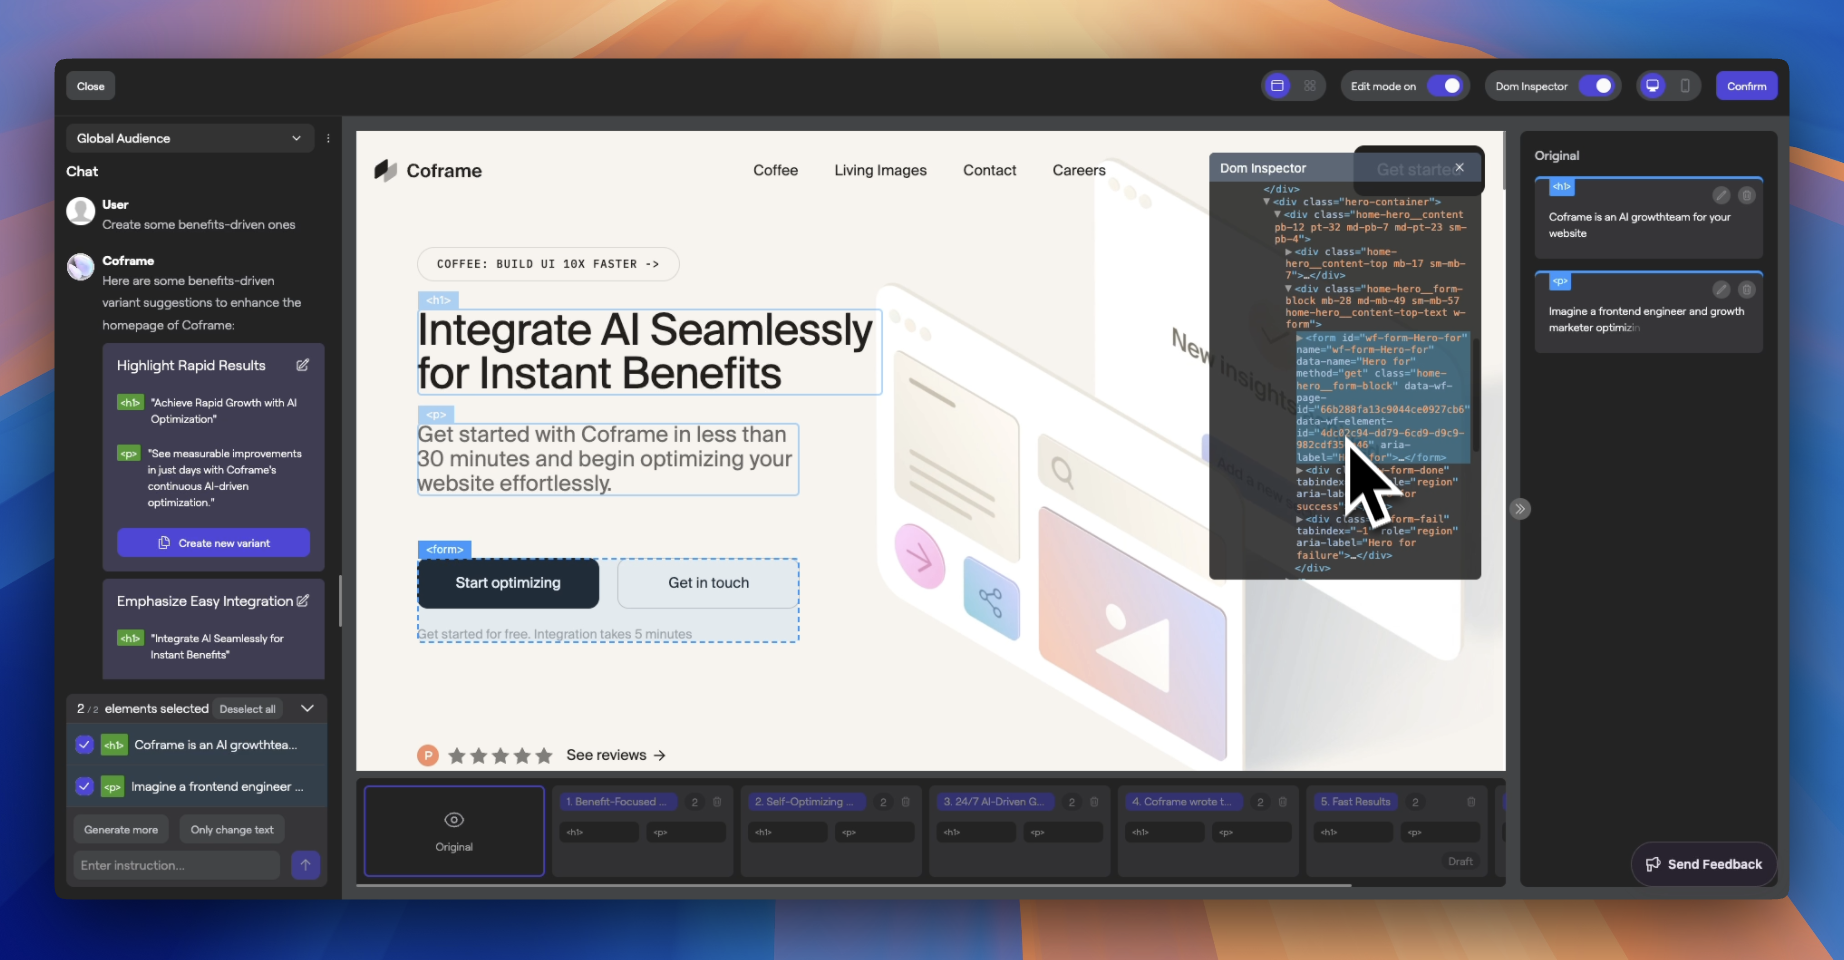
# Ad-to-Page Optimization Source: https://docs.coframe.com/advanced-features/ad-to-page-optimization Optimizing landing pages based on ad campaigns Ad-to-Page Optimization aligns your landing page content with your ad campaigns, potentially improving conversion rates and lowering costs per click (CPC) due to higher relevance scores from platforms like Google Ads. ## Supported Platforms * Google Ads (Beta) * Facebook Ads (Alpha) ## How It Works * **Dynamic Content Alignment**: Coframe automatically adjusts your landing page content to match the keywords or ad copy from your ad campaigns. * **Increased Relevance**: By mirroring the messaging of your ads, visitors find a more cohesive experience, increasing the likelihood of conversion. * **Quality Score Improvement**: Platforms like Google Ads reward relevant landing pages with better Quality Scores, potentially lowering your CPC. ## Setting Up Ad-to-Page Optimization for Google Ads (Beta) ### Prerequisites * Active Google Ads campaigns * Coframe script installed on your landing pages ### Step-by-Step Guide 1. **Connect Your Google Account** * In your Coframe dashboard, navigate to the Ad-to-Page Optimization section. * Click on "Connect Google Ads Account" and follow the authentication process. 2. **Select Campaign and Ad Group** * You'll see a table with all campaigns in your account. * Search or click on a campaign to view its ad groups. * Select the desired ad group. 3. **Choose Optimization Type** * Select either "Keywords" or "Ads" for alignment. 4. **For Keyword-based Optimization:** * Search and select the keyword you want to optimize for. * Ensure the keyword UTM parameter is active. * If not active, you can manually enable it or use Coframe's tool to add it with a provided link. 5. **For Ad-based Optimization:** * Ensure the ad UTM parameter is active. * Select the specific ad you want to align with. 6. **Create Optimizer** * Click "Create Optimizer" to proceed to the editor. * A new segment will be automatically created in the modal, with the context being the keyword or ad content. 7. **Generate Variants** * Proceed with the standard editor experience to create and refine variants. * Refer to the [Variant Creation](/editor/variant-creation) guide for detailed steps. ## Setting Up Ad-to-Page Optimization for Facebook Ads (Alpha) The process for Facebook Ads is similar to Google Ads, following the Facebook structure: 1. Connect your Facebook Ads account. 2. Select Campaign > Ad Set > Ad. 3. The system will align the page based on the selected ad, passing the ad creative into the context of the optimizer. ## Best Practices * **Consistent Messaging**: Ensure that the language and tone of the landing page match that of the ads. * **Keyword Insertion**: Use dynamic keyword insertion carefully to maintain readability and coherence. * **Compliance**: Verify that dynamic content complies with advertising policies and regulations. ## Coming Soon * Optimization at the ad group and campaign levels for Google Ads. ## Monitoring Performance * Use the [optimizer view](/optimization/optimizer-view) to monitor conversion rates for traffic coming from the respective ad or keyword. * Compare performance between optimized and non-optimized landing pages. # Audience Segments Source: https://docs.coframe.com/editor/audience-segments Learn how to define and manage audience segments in Coframe's editor ![Audience Segment](https://mintlify.s3.us-west-1.amazonaws.com/coframe/public/audience-segment.png) ### Audience Segment Dropdown At the top of the left panel is the **Audience Segment Dropdown**, which defines the audience for your optimizations. * By default, the audience is set to **Global**, affecting all visitors. * Click **+ Create New** to define a new audience segment tailored to specific criteria. * Select **+ Choose Existing** to pick from previously created audiences. #### Audience Modal When creating a new audience, a modal will appear where you can: * **Name Your Audience**: Provide a required **Audience Title**. * **Add Context (Optional)**: Supply **Audience Context** for the AI to generate more relevant content. * **Define Segment Criteria**: Specify URLs using **equals to** or **contains**. You can add multiple URLs, such as specific UTM parameters. Choose between **Desktop** or **Mobile** users. Select from **iOS**, **Android**, **Windows**, **Mac**, or **Linux** platforms. Target users based on their **Country** and **Language** settings. Differentiate between **First-Time** and **Returning** visitors. Available in private beta: * **Company** * **Industry** * **Role** * **Seniority** To the right of the dropdown, the **ellipsis icon (⋯)** provides additional options when you're on a non-global audience: * **View Audience Details**: Navigate to the Audience page for more information. * **Delete Optimizer**: Remove the current optimizer if no longer needed. # Manual Editing Source: https://docs.coframe.com/editor/manual-editing Learn how to manually edit elements in Coframe's editor using the right panel ## Right Panel ![Right Panel](https://mintlify.s3.us-west-1.amazonaws.com/coframe/public/right-panel.png) The right panel appears when you choose to edit an element, providing tools for content and style customization. ### Editing Panel * **Opening the Panel**: * Click the **Edit Icon** on an element. * Alternatively, use the small gray tab on the right edge to open or close the panel. * **Element Actions**: * **Trash Can Icon**: Removes the element from scope and variant considerations. * **Pencil Icon**: Opens the element in editing mode. * **Editing Modes**: * **Content Editing**: * Modify text and content directly in the input field. * **Style Editing**: * Use the design palette to adjust colors, fonts, spacing, and more. * **Code Editing**: * Toggle **Edit Code** to access and modify the underlying HTML, CSS, or JavaScript. * **Saving Changes**: * Click **Save Element** to apply your edits and update the variant. # Metrics and Goals Source: https://docs.coframe.com/editor/metrics-and-goals Selecting metrics to optimize for Defining clear metrics and goals is crucial for effective optimization. Here's how to set up your metrics in Coframe: ## Setting Up Conversion Events After creating your variants, you have two main options for defining conversion events: 1. **Select Elements in the Editor** * Open the editor interface with your variants. * Use the iframe to select clickable elements on your page. * You can choose multiple elements, such as: * Specific buttons (e.g., "Sign Up", "Buy Now") * Links * Any other clickable elements that indicate a conversion 2. **Specify a Conversion URL** * Manually enter a URL that, when visited, represents a conversion. * For example, you might enter "example.com/thank-you" to track when users reach a thank-you page after a purchase. ## Best Practices * **Align Conversion Events with Business Goals**: Choose elements or URLs that directly reflect your desired user actions. * **Be Specific**: Select precise elements or URLs to ensure accurate tracking of conversions. * **Consider User Journey**: Think about the key steps in your user's journey that indicate success for your business. # Variant Creation Source: https://docs.coframe.com/editor/variant-creation Learn how to use Coframe's editor to create and manage AI-driven variants for your website Coframe's Editor allows you to optimize your website using AI-driven variants. This guide will walk you through the process of creating and managing variants, focusing on the left panel and the bottom panel of the Editor interface. ## Overview The Editor interface is divided into several key areas: * **Left Panel**: AI chat window and element selection. * **Main View (Iframe)**: Visual representation of your website. * **Bottom Panel**: Variant management. In this guide, we'll focus on the **Left Panel** and **Bottom Panel** to help you make the most of Coframe's variant creation capabilities. ## Left Panel ![Left Panel](https://mintlify.s3.us-west-1.amazonaws.com/coframe/public/left-panel.png) The left panel contains the AI chat window and the selected elements list. This is where you'll interact with the AI to generate content variants and manage the elements in scope. ### AI Chat Window Below the Audience Segment Dropdown is the **AI Chat Window**, which occupies most of the sidebar. * **Generating Variants**: * **Prompting**: Type instructions or requests to guide the AI in generating variants. * **Generate More**: Click this button to let the AI produce additional variants automatically. * **Selected Elements List**: * Located above the input bar. * Shows elements that are **In Scope**. * Elements can be: * **Selected**: Actively included in variant generation. * **Deselected**: Temporarily excluded from immediate variant generation but still part of offline processes. * **Removing Elements from Scope**: * Deselect the element. * Click the **Trash Can** icon in the element list or directly in the iframe. ## Generating Variants With elements selected, leverage AI to create optimized content variants. * **AI Generation Process**: * The AI determines the type of content to generate (text, HTML, JavaScript) based on the selected elements. * Typically, **three variant options** are produced per generation cycle. * **Managing Variant Options**: * **Editing Variants**: Click the **Edit Icon** on a variant to manually adjust its content before saving. * **Creating Official Variants**: Click **Create New Variant** to save a variant option to your list for testing. * **Updating Existing Variants**: When viewing a specific variant, click **Update Variant** to apply changes. * **Previewing Variants**: * Hover over a variant option to see how it looks in the editor. * Each variant has a title summarizing its main idea or theme. You can also edit variants manually. See [editing variants](/editor/editing-variants) for more information. ### Managing Variants ![Variant Grid View](https://mintlify.s3.us-west-1.amazonaws.com/coframe/public/grid-view.png) The **Bottom Panel** is where you manage all your generated variants. * **Variant List**: * Located below the iframe, displaying all your variants. * The **Original** variant is always on the far left. * **Switching Between Variants**: * Click on any variant to load it in the main view for examination. * **Variant Details**: * Shows which elements are edited and the variant's title. * A **Draft Badge** indicates the variant is not yet finalized. * **Deleting Variants**: * Remove unwanted variants by clicking the **Trash Can Icon**. ### Beta Feature: Generative UI Components > **Beta Feature** Unlock advanced capabilities to generate entire sections and dynamic CMS components using AI. #### Enabling Generative UI Components * Type `/enable genui` into the prompt input to activate the feature. #### Using the Feature 1. **Select or Insert One Element**: Focus on a single element for generation. 2. **Provide a Description**: Describe the section or component you want the AI to create. 3. **Generation Process**: * The AI will build the section with editable content and styles. 4. **Editing Generated Components**: * Use the generated CMS interface to fine-tune content and design elements directly. ## Finishing Up After crafting and reviewing your variants, finalize your optimizations. * **Confirm Variants**: * Click the **Confirm** button located in the top right corner of the Editor. * **Metric Selection Step**: * You'll be guided to select performance metrics to evaluate your variants' effectiveness. # Website Viewer Source: https://docs.coframe.com/editor/website-viewer Learn how to use Coframe's website viewer, including the iframe, grid view, mobile view, and DOM inspector ## Main View (Iframe) ![Iframe](https://mintlify.s3.us-west-1.amazonaws.com/coframe/public/iframe.png) The iframe displays your website for real-time editing and previewing. ### Chrome Extension Requirement > **Note**: Ensure the **Coframe Chrome Extension** is installed to utilize the Editor fully. ### Interacting with Elements * **Selecting Elements**: * **Hover** over an element to highlight it with a blue rectangle and see its type. * **Click** to select the element, adding it to your **In Scope** list. * **Adding New Elements**: * **Plus Buttons**: Appear above and below hovered elements. * Click to **Insert a New Element**, which you can customize via prompts or manual editing. * **Editing Elements**: * **Pencil Icon**: Click to open the element in the editing panel. * **Deselecting Elements**: * Click the element again to deselect. * Click the **X** button on the top right corner to remove the element from scope. ## Top Bar The top bar provides navigation and various view options to enhance your editing experience. ### Left Side * **Close Button**: Click to exit the Editor and return to the main dashboard. ### Right Side * **Grid View**: Toggle to compare variants side by side in a grid layout. * **Page View**: Switch back to the standard single-page view. * **Edit Mode**: Enable or disable element selection and editing. * **DOM Inspector**: Toggle the DOM tree view for precise element selection. * **Device Toggle**: Switch device views and adjust scale (50% to 150%). ### Grid View ![Grid View](https://mintlify.s3.us-west-1.amazonaws.com/coframe/public/grid-view.png) The **Grid View** allows you to compare multiple variants side by side. ### Mobile View ![Mobile View](https://mintlify.s3.us-west-1.amazonaws.com/coframe/public/mobile-view.png) Switch to **Mobile View** to see how your website and variants look on mobile devices. ### DOM Inspector ![DOM Inspector](https://mintlify.s3.us-west-1.amazonaws.com/coframe/public/dom-inspector.png) Use the **DOM Inspector** to navigate and select elements directly from the DOM tree for precise control. # Business Intelligence Source: https://docs.coframe.com/getting-started/business-intelligence Providing brand context for better AI-generated content To help Coframe generate high-quality content that aligns with your brand, you can provide additional context in the **Business Intelligence** section. ## Adding Business Information 1. **Navigate to Business Intelligence** In your Coframe dashboard, select your project and go to the **Business Intelligence** tab. 2. **Provide Brand Details** * **Business Overview**: Provide a brief overview of your business. * **Key Benefits**: List the main benefits your product or service offers. * **Audience**: Describe your ideal customer profiles. * **Objections**: List common objections your audience may have. * **Business Objectives**: Describe your business objectives from a conversion perspective. 3. **Save Changes** Click **Save** to update your brand intelligence data. ## Impact on Content Generation By providing this information, Coframe will generate content that is more aligned with your brand messaging and target audience, leading to higher-quality variants and better conversion rates. # Setting Up Your First Optimizer Source: https://docs.coframe.com/getting-started/first-optimizer 10 steps to take you from zero to hero After creating your Coframe account, the next step is to connect your website to Coframe. **Integrations typically take 30 minutes or less, from start to finish.** 1. Log in to your Coframe dashboard. 2. Click on the **+ New Page** button. 3. Enter your page URL into the input field, and walk through the onboarding questions. Answers to these questions will be stored in the [Business Intelligence](/business-intelligence) tab. 4. Use the [WYSIWYG Editor](/editor/variant-creation) to select elements, then generate variants either through prompting or manually. Once you've added a set of variants you're happy with, click the **Define Metric** button. 5. Define your conversion goal: * Option A: Select one or more buttons or links on the page that indicate a successful conversion when clicked. * Option B: Enter a specific URL that users should reach after completing a conversion. 6. Review your variants to ensure everything looks correct. 7. Click **Continue to integration** to start the optimization process. 8. Once you've integrated, confirm the integration with the **Check Integration** button. You'll need to visit your site once you've integrated to send an initial event to the integration. 9. (Optional) confirm the conversion goal integration by clicking the **Check Conversion Integration** button. You'll need to execute a conversion event on your site once you've integrated to send an initial event to the integration. 10. Hit **Publish** and you're off to the races! ## Integration Integrations typically take 30 minutes or less and involve adding a script tag to the `` of your website. Coframe supports multiple integration methods for various platforms and frameworks, including:
WordPress Shopify Webflow Framer NextJS React Vue Angular ...and more
Integration is straightforward with a simple script tag for most platforms. You can find integration instructions for each platform by clicking on the platform on the integration page in your dashboard. ### Analytics and CDP Integrations In addition to web platforms, Coframe also integrates with various analytics and Customer Data Platform (CDP) solutions:
Segment Statsig PostHog ...and more on request
To set up these integrations: 1. Go to your workspace settings 2. Scroll to the integrations section 3. You'll see toggle switches for each supported platform (currently Segment, Statsig, and PostHog) When an integration is enabled, Coframe will send events with `init::coframe` to the respective platform's client pixel on each visitor. These events contain a `variantId` field, indicating the variant that the visitor was assigned. This allows you to track and analyze the performance of different variants across your preferred analytics platforms. # Introduction to Coframe Source: https://docs.coframe.com/introduction Drive more growth with continuous, AI-powered website optimization Coframe drives more conversions and revenue with AI-powered conversion optimization, saving you the manual effort and cost of traditional A/B testing. We help your website evolve alongside your audience—all while keeping you in the driver's seat. ## Key Features Coframe continuously optimizes your website with variations of your copy, UI, and visuals, improving performance over time without waiting for statistical significance. You have full control over approvals for variants on your site, ensuring that all changes align with your brand and messaging. Benefit from the latest advancements in AI, including improvements in text, UI, and visual content generation. Simple setup with a script tag compatible with all major web frameworks in minutes. We support Wordpress, Shopify, React, Vue, Shopify, Webflow, and more. Provide context about your brand to help the AI generate high-quality, aligned content. Seamless integration with analytics platforms like Segment, Statsig, PostHog, and more for comprehensive metric tracking. ## How Coframe is Different Unlike traditional A/B testing tools that require waiting for statistical significance to implement changes, Coframe employs continuous optimization. Our [optimizer algorithm](/optimization/optimizer-methodology) adapts in real-time, learning from user interactions to deliver the best possible experience. This means no more stagnant content—your website evolves along with your users' preferences. ## FAQs No, Coframe does not negatively impact SEO. We can configure the platform to display the original content to search engines like Google, ensuring your SEO rankings remain unaffected. We recommend having at least **30,000 monthly visitors** to see meaningful results within a month. This helps the AI gather sufficient data to optimize effectively. Coframe is optimized at the edge to have a minimal impact on your site's performance. Users will experience your website without any noticeable delays. Absolutely. You have full control over approvals for any variants implemented on your site. Coframe puts you in the driver's seat while offering the benefits of AI-driven optimization. Coframe supports all major web platforms, including WordPress, Shopify, Webflow, Framer, and more. We also support all major web frameworks like React, Vue, Angular, and more. Integration is straightforward with a simple script tag. While possible, we do not recommend using Coframe with Google Tag Manager because it loads scripts asynchronously, which can interfere with real-time optimization. Instead of declaring a winner, Coframe continuously identifies and updates the current best performer to ensure ongoing optimization. This approach allows your website to adapt in real-time to changing user behaviors without settling on a single variant. To begin your journey with Coframe, please book a time with our team on our calendar for a personalized demo: [https://cal.com/coframe/contact-sales](https://cal.com/coframe/contact-sales) # Coffee ☕ Source: https://docs.coframe.com/labs/coffee Build and iterate on your UI 10x faster with AI – right from your own IDE! — **Cof**rame **F**ront-**E**nd **E**ngineer *Build and iterate on your UI 10x faster with AI – right from your own IDE!*

GitHub Repo stars

> **Coffee** caffeinates your frontend development workflow with AI. This project is intended to be more than just a nice demo but rather an ergonomic tool that can write and interact with production-quality code. **Featured on [GitHub Trending](https://github.com/Coframe/coffee)!** ## Features * Works with any React codebase including Next.js, Remix, etc. * Reliable enough for most standard UI components. * Supports most simple prop types (data, callbacks, etc). * Uses the same DX for both editing existing components and creating new components from scratch. * Generates clean, maintainable code. * This is where the future of AI-assisted code generation is headed! 🚀 ## Try It No dependencies, no setup. Just run your React web app normally, and then open another shell in the same directory and run: ```bash docker run --pull=always -it -e OPENAI_API_KEY=${OPENAI_API_KEY} -v $(pwd):/mount coframe/coffee:latest ``` You can also build the image yourself from the `/react` directory: ```bash ./dev.sh build OPENAI_API_KEY=your_api_key ./dev.sh ../path/to/your/frontend/repo ``` Keep an eye on the terminal running the Docker container to see what Coffee is up to. It's fun to see the code being generated! ## How It Works Coffee uses Docker to ensure any agentic code it runs is fully isolated. It's implemented in Python, but you don't need to touch Python to use Coffee. The code-generation agent is relatively simple. When you run Coffee, it listens for changes to `js/jsx/ts/tsx` files in your source directory. If it detects a `` JSX component, it will kick off its magic! ```jsx Here is where you put your prompt that Coffee will use to generate the first version of your desired component. This is the same type of prompt that you'd use with any LLM like ChatGPT, so feel free to get creative and apply your favorite prompt engineering tricks. Finally, you can also pass in any parameters you want from your parent component by simply adding them as demonstrated above. ``` Every time you save your source file, Coffee checks for any `` components that need brewing. It passes your parent component code, any existing child component code, your prompt, and any custom configuration to the OpenAI chat completions API to generate a new version of the target component. > ℹ️ Your application may display an error immediately after saving it the first time, as the Coffee component has not been written yet. This is normal and will resolve once the Coffee agent has brewed the component. Iterating on a component after it has been brewed is just as easy: ```jsx To edit and update the brewed component, replace the prompt with your desired changes. For instance, "make the button background darker". ``` The brewing process is currently a little slow, but we're working on ways to make it significantly faster. Finally, once you're happy with your brewed component, you can add a `pour="ComponentName.tsx"` prop to your `` component. Save the file, and it will automatically replace the `` component with the generated component. ```tsx export function Example() { return ( console.log('clicked')} pour="MyButton.tsx" > Your prompt here ) } ``` When you save this file, Coffee will replace the code with: ```tsx import MyButton from './MyButton' export function Example() { return ( console.log('clicked')} /> ) } ``` Now you have a fully functional, reusable React component that's ready for production. **The coolest part of Coffee is that you can edit existing React components just as easily as creating new ones.** Suppose you want to edit the `MyButton` component. Just add the `coffee="description of change"` prop: ```tsx export function Example() { return ( console.log('clicked')} coffee="make the button color blue" /> ) } ``` After saving, Coffee detects this "caffeinated" component and updates it for you. You can keep iterating like this indefinitely—you can never run out of Coffee! 😂 Once you're satisfied, remove the `coffee` prop. ## Related * [v0.dev](https://v0.dev) – An amazing generative React playground by [Vercel](https://vercel.com) * We're hoping they open-source it soon to reach a wider audience 🥹 * We wanted to experiment with a DX more natively integrated into a developer's existing workflow to understand the trade-offs between approaches. * [Screenshot to Code](https://github.com/abi/screenshot-to-code) – Open-source project showcasing the power of GPT-V for UI generation 🤯 * One of the first projects to showcase GPT-V's capabilities for UI generation from an image. * [Draw a UI](https://github.com/SawyerHood/draw-a-ui) – Similar concept! * [Cursor](https://cursor.sh/) – AI-native IDE that the Coframe team uses and loves 🥰 * Coffee can be used in any IDE, but we're huge fans of Cursor and are excited to see what they launch next! ## Community Join us on [Discord](https://discord.gg/coframe) for support, to showcase what you've brewed, and for good vibes in general. Follow us on [Twitter](https://twitter.com/coframe_ai) for feature releases, product updates, and other exciting news! ## Core Contributors If you'd like to contribute, submit a pull request! ⚡ We are also hiring generalist and AI engineers passionate about the future of UX/AI. Coffee is just one of the exciting projects we have brewing. If you want to build this future with us, please DM us on [Twitter](https://twitter.com/coframe_ai)! ## Local Development ```sh cd react pip3 install -r dev_requirements.txt pytest ``` ## License Apache 2.0 © [Coframe](https://coframe.com) # Living Images (Deprecated) Source: https://docs.coframe.com/labs/living-images Let your images optimize themselves with generative AI Let your images optimize themselves in minutes with generative AI. Just enter your site, select the images you want improved, and add our script or image URL. Our AI tests and learns what works over time, generating images that perform better and better. > **Note**: This feature is deprecated and no longer available. The service has been discontinued as we focus on our core product offerings. **Featured as the #1 Product of the Day on [Product Hunt](https://www.producthunt.com/posts/living-images)!** ## Welcome! We're glad you're here. This guide is designed to walk you through **Living Images**—letting your images optimize themselves. Let's get started! ## Historical Note Living Images was a tool that allowed websites to optimize their images using AI-powered A/B testing. The service included features like: * Background modification for product photos * Full-image modifications for stock photos * Automated A/B testing and optimization * Custom AI model for image generation This service is no longer active. We recommend exploring our core product for current features and capabilities. ## Integration > **Important**: This feature has been deprecated. The API endpoints described below are no longer active. For historical reference, this product previously supported URL/API and script-based integrations. These integration methods are no longer supported. If you're looking to optimize images with Coframe: 1. Check out our core product features 2. Join our [Slack community](#) for updates on new features > **Note**: All legacy Living Images features have been discontinued. ## Looking Forward For support and updates on our features: * Join our [Slack community](#) * Contact our team at [team@coframe.com](mailto:team@coframe.com) *** # Optimizer Methodology Source: https://docs.coframe.com/optimization/optimizer-methodology Understanding Coframe's Optimizer Algorithm Coframe utilizes the Multi-Armed Bandit (MAB) framework to optimize conversion rate. We solve the MAB formulation to dynamically optimize website content. Our approach extends the traditional MAB formulation to enable the addition and removal of variants over time which allows to adapt to user behavior over time. ### Key Enhancements 1. **Maintaining an Adaptive Holdout Baseline**: A control variant is retained for to estimate the baseline performance, the holdout allocation is dynamically adjusted to optimize for maximal conversions once enough data has been collected to establish a baseline. 2. **Dropping Underperforming Arms**: Variants that consistently underperform are removed based on their allocations which is proportional to the belief of their performance. 3. **Intelligent Variant Generation**: Our AI models generate new variants by analyzing and incorporating insights from ongoing experimental data. 4. **Incubation Period for New Arms**: New variants are given a protection period to gather sufficient data before being evaluated for potential removal. ## Standard Multi-Armed Bandit Overview In the classical MAB problem, an agent selects among $K$ arms (variants), each with an unknown reward distribution. The objective is to maximize the cumulative reward over time by balancing exploration (trying out less-known arms) and exploitation (selecting the best-known arms). ### Mathematical Formulation * **Arms**: $\mathcal{A} = \{1, 2, \dots, K\}$ * \*\*At each time \*\*: * Select an arm $a_t \in \mathcal{A}$. * Receive a reward $r_t$ drawn from the probability distribution associated with $a_t$. In our context, the agent aims to minimize **regret** $R(T)$, defined as: $$ R(T) = T \mu^* - \sum_{t=1}^T r_t $$ where $\mu^*$ is the expected reward of the optimal arm. In the context of website optimization, regret is closely tied to conversion rate. The regret represents the difference between the cumulative reward (conversions) obtained by always choosing the optimal arm and the actual cumulative reward obtained by the algorithm. A lower regret implies that the algorithm is performing closer to the optimal strategy, which in turn means it's achieving a higher overall conversion rate. By minimizing regret, the algorithm effectively maximizes the conversion rate over time. ## Coframe's Approach ### Algorithm Steps #### Initialization * **Initial Set of Arms**: $\mathcal{A} = \{0, 1, 2, \dots, K\}$, where $0$ represents the baseline or control variant. * **Initial Traffic Allocation**: Distribute traffic equally among all arms, i.e., each arm receives $\frac{1}{K+1}$ of the traffic. * **Initial Belief**: For each arm, we initialize its belief with the same prior. * **Iteration Start**: The algorithm begins its iterations, with each iteration representing a one-hour time period. #### At Each Time Step $t$ (Hourly Iteration) 1. **Arm Selection**: * Use a selection policy (Thompson Sampling) to choose an arm $a_t$. 2. **Reward Observation**: * Observe reward $r_t$ ($r_t = 1$ if a conversion occurs, $r_t = 0$ otherwise). 3. **Parameter Update**: * Update the success ($S_i$) and failure ($F_i$) counts for arm $a_t$. **Note on Experimental Unit**: Our experimental unit is "unique visitor hours". Within each one-hour iteration, exposures are deduplicated by visitor using a cookie. This means that the same person within the same iteration will see the same variant/arm, ensuring consistency in the user experience and data collection. #### Dropping Underperforming Arms * **Criteria for Dropping**: * An arm is considered for removal if its traffic allocation falls below a predefined threshold (e.g., 2%) and its incubation period has elapsed. * **Rationale**: * This allows for the addition of new variants to replace underperforming ones. #### Introducing New Arms * **Generation**: * New variants are continuously created by our generative AI models and can be added to an ongoing MAB when other variants are dropped. * **Conditioning Factors**: * Historical rewards $\{ r_i \}$ * Content features $\{ v_i \}$ * The model leverages this information to continuously incorporate learnings and produce variants with a higher expected reward. #### Traffic Reallocation * **Adjust Traffic Allocation**: * Traffic allocation for each variant is automatically adjusted every iteration. ### Selection Policy: Thompson Sampling Thompson Sampling is used because it balances exploration and exploitation in a regret minimizing fashion. #### Posterior Sampling For each arm $i$: * **Successes**: $S_i$ * **Failures**: $F_i$ * **Beta Distribution**: Sample $\theta_i \sim \text{Beta}(S_i + alpha_0, F_i + \beta_0)$ * **Arm Selection**: Choose arm $a_t$ by sampling from all arms and selecting the arm associated to the maximum value * Batch processing: We process observations in batches and sample from the posterior distribution after all the observations in one iteration have been accounted for. ### Traffic Allocation Constraints * **Minimum Allocation for Holdout Baseline**: * Ensure the holdout baseline arm $a_0$ retains at least a fraction $\alpha$ of the traffic (e.g., $\alpha = 0.05$). ## Advantages Over Standard MAB 1. **Continuous Evolution**: New variants are regularly introduced, keeping content fresh and aligned with traffic behavioral patterns. 2. **Efficient Resource Utilization**: Underperforming variants are removed, reallocating resources to better-performing ones. 3. **Accelerated Optimization**: AI-generated variants, informed by past performance, may lead to higher rewards more quickly. 4. **Robust Benchmarking**: Maintaining a constant baseline variant allows for consistent performance tracking over time. ## Mathematical Details ### Reward Estimation For each arm $i$: * **Estimated Conversion Rate**: $$ \hat{\mu}_i = \frac{S_i}{n_i} $$ where $n_i = S_i + F_i$ is the total number of times arm $i$ has been selected. * **Credibility Intervals**: We use Bayesian methods to estimate the credibility interval for $\hat{\mu}_i$. This provides a probabilistic range of plausible values for the mean of the underlying conversion rate, given the observed data and prior beliefs. For each arm $i$, we can calculate the posterior distribution: $$ P(\mu_i | \text{data}) \propto P(\text{data} | \mu_i) \cdot P(\mu_i) $$ where $P(\mu_i)$ is the prior distribution and $P(\text{data} | \mu_i)$ is the likelihood. The 95% credibility interval can then be derived from the posterior distribution. ### Dropping Criterion Justification * **Balancing Exploration and Exploitation**: Thompson Sampling addresses the exploration-exploitation dilemma by minimizing regret which allows it to optimally explore arms that are statistically promising, while still exploiting those that been shown to be good. ### AI-Conditioned Variant Generation * **Objective**: Generate a new variant $v_{\text{new}}$ expected to have a higher reward than the average of the dropped arms. * **Model Inputs**: * Features of previous variants $\{ v_i \}$ * Performance metrics $\{ \hat{\mu}_i \}$ * **Model Output**: * A new variant $v_{\text{new}}$ predicted to perform better. * **Expected Reward of New Variant**: The expected reward of the new variant is: $$ \mu_{\text{new}} = \mathbb{E}\left[ r_{\text{new}} \mid v_{\text{new}} \right] $$ Our goal is for $\mu_{\text{new}} > \hat{\mu}_{\text{avg}}$, where $\hat{\mu}_{\text{avg}}$ is the average performance of previous arms. ## Implementation Considerations ## Comparison with Standard MAB | Aspect | Standard MAB | Coframe's Modified MAB | | ------------------------ | -------------------------------- | ----------------------------------------- | | Arm Pool | Fixed | Dynamic (arms can be added/dropped) | | Underperforming Arms | Continue to receive some traffic | Dropped when below performance thresholds | | New Variant Introduction | Not typically included | Introduces new arms | | Baseline Variant | Not necessarily maintained | Constant holdout baseline is maintained | | Adaptability | Limited to initial arm set | Continuously adapts with new variants | ## Practical Example Assume we start with: * **Holdout Baseline**: $v_0$ * **Initial Variants**: $v_1$, $v_2$, $v_3$ ### Process Flow 1. **Initialization**: * Equal traffic allocation. * Collect observations over time for each variant. 2. **Evaluation**: * After sufficient data, suppose $v_2$ falls below the 2% allocation threshold. 3. **Dropping Underperformer**: * Drop $v_2$ from the active arm set. 4. **Variant Generation**: * Generate a new variant $v_{\text{new}}$ conditioned on past variants and their performance. 5. **Reallocation**: * Redistribute traffic among $v_0$, $v_1$, $v_3$, and $v_{\text{new}}$. 6. **Iteration**: * Repeat the process, continuously refining the variant pool. ## In summary... Coframe's multi-armed bandit approach offers a robust and efficient method for website content optimization by: * **Leveraging Past Performance**: AI-generated variants are informed by historical data, increasing the likelihood of success. * **Dynamic Adaptation**: The ability to drop and introduce arms keeps the optimization process responsive to changing user behaviors. * **Maintaining a Baseline**: A constant control variant ensures that performance improvements are measured accurately. ### References * Auer, P., Cesa-Bianchi, N., & Fischer, P. (2002). *Finite-Time Analysis of the Multiarmed Bandit Problem*. Machine Learning. * Kleinberg, R., & Slivkins, A. (2010). *Multi-Armed Bandits in Metric Spaces*. *Proceedings of the 41st Annual ACM Symposium on Theory of Computing (STOC)*. * Bubeck, S., Munos, R., & Stoltz, G. (2011). *Pure Exploration in Finitely-Armed and Continuous-Armed Bandits*. *Theoretical Computer Science*. # Optimizer View Source: https://docs.coframe.com/optimization/optimizer-view Understanding and Utilizing the Optimizer View in Coframe The Optimizer View in Coframe is your command center for monitoring and managing continuous, AI-driven optimization experiments on your website. This interface provides real-time insights into variant performance, traffic allocation, and conversion metrics, all wrapped in an intuitive and interactive dashboard. ## Overview At the top of the Optimizer View, you'll find: * **Optimizer Name**: Clearly labeled for easy identification. * **Objective**: A brief description of what the optimizer is aiming to improve (e.g., "Improve click-through for sign-up button"). * **Export Options**: Buttons to **Export CSV** data or **View in Editor** for deeper customization. ## Main Chart Area The main area of the Optimizer View features a unique, dual-layered chart that visualizes both the performance and traffic allocation of your variants over time. ### Performance Chart * **Line Chart**: Displays the conversion rate of each variant over time. * **Confidence Intervals**: Optionally show or hide 95% credible intervals to understand the statistical reliability of the data. * **Pan and Zoom**: Navigate through different time frames by panning and zooming on the chart. * **Date Range Selection**: Customize the time period for which data is displayed. ![Coframe Optimizer Chart](https://mintlify.s3.us-west-1.amazonaws.com/coframe/public/coframe-basic-chart.png) The image shows the optimizer's Performance chart. It has two sections: 1. **Conversion Rate Chart**: * Line chart displaying variant conversion rates over time * Color-coded lines for each variant * Y-axis: conversion rate %, X-axis: time 2. **Traffic Allocation Chart**: * 100% stacked bar chart showing traffic distribution * Matching colors to conversion rate chart * Y-axis: traffic %, X-axis: aligned with upper chart This visualization allows quick assessment of variant performance and traffic distribution over time. ### Variant Selection * **Toggle Variants**: Select or deselect variants to include in the charts. ## Chart Views Switch between different data perspectives using the view toggles: * **Performance**: The default view showing conversion rates and traffic allocation. * **Visitors**: Replaces the performance chart with a bar chart displaying the number of visitors, adjustable by hour, day, or week. * **Events**: Focuses on conversion events as defined in your objectives, also adjustable by time intervals. ## Variant Insights Panel To the right of the main chart, the Variant Insights Panel provides a quick snapshot of variant performance: * **Color-Coded Rankings**: Variants are listed and color-coded according to their performance metrics. * **Sorting**: Automatically sorted based on the selected metric—conversion lift, visitor count, or event count. ## Managing Variants ### Variants to Approve Coframe's AI periodically generates new variants that require your approval before going live. * **Preview Variants**: See how each proposed variant looks on your website. * **AI-Generated Rationale**: Understand the reasoning behind each variant's creation. * **Approve or Disapprove**: Quickly make decisions to keep your optimization process moving. * **Edit Variants**: Modify variants directly in the dashboard or open them in the editor for advanced changes. ### Generate New Variants * **Quality Mode**: Generates high-quality variants using a comprehensive AI process (approximately 1 minute). * **Fast Mode**: Quickly generates variants using a powerful, closed-source model. * **Customization**: Tailor the generation process according to your needs for speed or quality. ## Variants Table Keep track of all your variants in one place. * **Status Indicators**: Easily see if a variant is the baseline, live, or queued. * **Essential Metrics**: * **Title**: The name of the variant. * **Visitors**: Number of visitors exposed to the variant. * **Conversions**: Number of conversions attributed to the variant. * **Conversion Rate**: Percentage of visitors who converted. ### Advanced Options * **Confidence Intervals**: Toggle to display the 95% credible interval for each variant's conversion rate. * **Impact Accounting**: * **Coverage**: Percentage of total traffic allocated to the variant. * **Global Lift**: Overall impact of the variant compared to the holdout baseline. * **Statistical Details**: * **P(Winner)**: Probability that the variant is the best performer. * **P(Baseline)**: Probability that the variant will outperform the baseline. ### Actions * **Preview on Website**: See the variant in action on your live site. * **Copy ID**: Easily copy the variant ID for reference or support inquiries. * **Delete Variant**: Remove underperforming or unwanted variants. ### Search and History * **Search Bar**: Find variants by title, ID, or content keywords. * **Variant History**: Access a complete log of all dropped variants by clicking the **History** button. ## Navigating to the Optimizer View Access the Optimizer View by selecting an optimizer from the **Optimizers** table in your page-level dashboard. This table provides a high-level overview of all your optimizers, including their objectives and current performance metrics. ## Tips for Maximizing the Optimizer View * **Regularly Approve Variants**: Keep the optimization process dynamic by reviewing and approving new variants. * **Use Advanced Metrics**: Dive into confidence intervals and statistical details to make informed decisions. * **Customize Your View**: Adjust date ranges, toggle metrics, and select variants to focus on the data that matters most to you. # Page View Source: https://docs.coframe.com/optimization/page-view Managing and Analyzing Your Pages in Coframe The **Page View** in Coframe provides a comprehensive dashboard for managing your website pages, monitoring optimization performance, configuring SEO settings, and adjusting page-specific options. This interface consolidates critical information and controls, allowing you to oversee all optimization activities at the page level. ## Navigating the Page View Access the Page View by selecting a page from the **Pages** list in the left sidebar. The sidebar includes a search bar to quickly find pages by name. Once a page is selected, you'll find a toolbar at the top with three main tabs: * **Overview** * **SEO** * **Settings** ## Overview Tab The **Overview** tab offers a high-level snapshot of your page's optimization performance. ### Notifications Banner At the top, you might see a banner if there's an action you need to take, such as integrating Coframe on your page or approving new variants. ### Performance Chart The main feature of the Overview tab is a dual-layered chart similar to the one in the Optimizer View but focused on page-level data. This chart aggregates the performance of all optimizers running on your page. #### Features * **Performance Metrics**: Toggle between **Performance** (conversion rates), **Visitors**, and **Events** (conversions). * **Primary and Secondary Metrics**: View different metrics to gain varied insights (secondary metrics coming soon). * **Pan and Zoom**: Navigate through different time frames with ease. * **Date Range Selection**: Customize the time period displayed on the chart. * **Optimizers Table**: The chart combines data from all optimizers. Note that optimizers are **Mutually Exclusive, Collectively Exhaustive**, ensuring comprehensive coverage. * **Baseline Comparisons**: * **Page-Specific Baseline**: Measures the performance of your page without any optimizations. * **Workspace-Wide Baseline**: A domain-level baseline set at 5% of traffic to assess overall Coframe impact. #### Incremental Conversions * **Estimated Incremental Conversions**: See the cumulative number of additional conversions Coframe has generated for your page. * **Visibility Threshold**: This data becomes available once the baseline has recorded at least 100 conversion events. ### Optimizers Table Below the performance chart, you'll find a table listing all the optimizers active on your page. #### Table Columns * **Name**: The identifier for each optimizer. * **Visitors**: Number of visitors who have interacted with the optimizer. * **Active Variants**: Number of live variants under each optimizer. * **Cumulative Conversion Lift**: Overall percentage increase in conversions attributed to the optimizer. * **Estimated Incremental Conversions**: The additional conversions generated by the optimizer. * **Recent Performance Snapshot**: A small chart displaying the last 7 days of performance for quick reference. ## SEO Tab The **SEO** tab allows you to manage how Coframe interacts with search engines and optimize your content for better visibility. ### Bot Visibility Toggle * **Only Show to Bots**: Enable this toggle to ensure that only the original version of your page is shown to search engine bots. This can help maintain consistent SEO rankings. * **Additional Information**: For more details, refer to our [Managing SEO](/seo-and-performance/managing-seo) guide. ### Keyword Optimization * **Top Keywords Table**: Displays a list of high-impact keywords for your page, sourced from SEMRush. * **Intent Filtering**: Filter keywords based on user intent categories like informational, navigational, or transactional. * **Keyword Importance Slider**: * **Adjust Relevance**: Each keyword has a slider ranging from 1 to 5. * **5**: Future variants will highly prioritize this keyword. * **1**: Future variants will likely ignore this keyword. * **Customized Content Generation**: Helps Coframe's AI generate content that aligns with your SEO strategy. ## Settings Tab The **Settings** tab provides options to configure integration status, adjust holdout percentages, control optimization activity, and manage advanced settings. ### Integration Status * **Integration Indicator**: Shows whether Coframe is successfully integrated with your page. * **Integration Button**: If not integrated, click the **Integrate** button to view step-by-step instructions. ### Holdout Percentage * **Default Holdout**: Set at **5%**, this is the portion of traffic that will see the original page without any optimizations. * **Adjustable**: You can modify this percentage to suit your testing needs. ### Page Activation * **Active Toggle**: * **Default**: On. * **Function**: If turned off, all visitors will see your original page without any Coframe optimizations. ### (Disabled) Auto-Approve Variants * **Auto-Approve Toggle**: * **Default**: Off. * **Function**: When enabled, new AI-generated variants are automatically added to the live queue without requiring manual approval from an admin. ### Danger Zone Proceed with caution when using the options in this section, as they can have significant impacts and cannot be undone. * **Reset Page**: * **Action**: Resets all optimizers on the page to their initial state. * **Irreversible**: This action cannot be undone. * **Rollback Page to Date**: * **Function**: Allows you to revert the page and its optimizers back to a specific date and time. * **Irreversible**: This action cannot be undone. * **Delete Page**: * **Action**: Permanently deletes the page's optimizers and all associated data from Coframe. * **Irreversible**: This action cannot be undone. ## Sidebar Navigation The left sidebar enhances navigation and organization: * **Pages List**: Displays all the pages you're managing with Coframe. * **Search Bar**: Quickly find pages by typing in the page name. * **Page Selection**: Click on a page to access its Page View and manage its settings. ## Tips for Maximizing the Page View * **Monitor Performance Regularly**: Keep an eye on the performance chart to track the effectiveness of your optimizations. * **Leverage Keyword Optimization**: Use the SEO tab to align your content with strategic keywords, enhancing both SEO and user engagement. * **Adjust Holdout Wisely**: Balance your holdout percentage to ensure statistical validity while maximizing optimization exposure. * **Backup Before Major Changes**: Consider exporting data before performing irreversible actions in the Danger Zone. # Segmentation Source: https://docs.coframe.com/optimization/segmentation Creating and Managing Audience Segments in Coframe Audience segmentation in Coframe empowers you to tailor your optimization strategies to specific groups of visitors based on attributes like location, device type, and more. By delivering personalized experiences, you can enhance user engagement and boost conversion rates. ## Understanding Audience Segments * **Mutually Exclusive and Collectively Exhaustive (MECE)**: In Coframe, audience segments are designed to be mutually exclusive and collectively exhaustive. This means each visitor will fall into one—and only one—segment, ensuring clear and accurate data analysis across your optimizers. * **Single-Dimension Segmentation**: Currently, Coframe supports segmentation on one dimension per page. For example, you can segment by location **or** by device type, but not both simultaneously. This approach simplifies management and keeps the user experience streamlined. ## How to Create a Segment Creating a new audience segment is straightforward and can be done directly from the editor. 1. **Access the Editor**: Navigate to the page you wish to segment and open the **Editor**. 2. **Open Segment Dropdown**: In the top-left corner of the editor, you'll see a dropdown menu for audience segments. 3. **Create a New Segment**: * Click on **"+ Create New"** to open the segment creation modal. ![Creating a New Segment](https://mintlify.s3.us-west-1.amazonaws.com/coframe/public/audience-segment.png) * In the modal, define your segment by selecting attributes such as location, device type, browser, etc. 4. **Define Segment Criteria**: * **Select Attributes**: Choose the criteria that define your segment. For example, select **Location** and specify **United States**. * **Set Conditions**: You can set conditions like "equals," "does not equal," "contains," etc., to fine-tune your segment. 5. **Save the Segment**: After configuring your segment, click **"Save"** to add it to your list of audience segments. The variants you set up for this optimizer will now be optimized for this segment. For a list of supported attributes, refer to [Editor: Audience Segments](/editor/audience-segments). ## Managing Your Segments You can view and manage all your audience segments from the **Audiences** tab in the dashboard. * **Access Audiences Tab**: Find the **Audiences** tab located at the bottom left of the dashboard. * **View Segments**: This section displays all the audience segments you've created. * **Edit Segments**: * Click on a segment to modify its criteria. * Update attributes or conditions as needed. * **Delete Segments**: * Remove segments that are no longer relevant. * **Note**: Deleting a segment will also remove its associated optimizer and data. ## Important Considerations * **New Optimizer Creation**: Each time you create an audience segment, Coframe automatically creates a new optimizer for that segment on the page. * **MECE Principle**: Segments are designed to be mutually exclusive and collectively exhaustive to prevent overlap and ensure that every visitor is accounted for in your analytics. * **Single-Dimension Limitation**: Currently, you can only segment on one dimension per page to maintain simplicity and avoid complexity in the user interface. ## Advanced Segmentation for Enterprises If you need to segment your audience on multiple dimensions simultaneously (e.g., by both location and device type), we offer advanced segmentation features for enterprise clients. * **Custom Configuration**: We can enable multi-dimensional segmentation tailored to your requirements. * **Contact Us**: Please [reach out to us](https://cal.com/coframe/contact-sales) to discuss how we can support your advanced segmentation needs. ## Benefits of Audience Segmentation * **Personalized Experiences**: Deliver content and optimizations that resonate with specific audience groups. * **Improved Conversion Rates**: Targeted messaging can lead to higher engagement and conversion rates. * **Enhanced Insights**: Gain deeper understanding of how different segments interact with your site, informing future strategies. # Managing SEO Source: https://docs.coframe.com/seo-and-performance/managing-seo Handling search engine bots and SEO considerations with Coframe Coframe provides powerful features to ensure that your content is optimized for search engines. ## SEO-Optimized Content Generation Coframe offers a powerful feature that allows users to incorporate top SEO keywords into the copy variants we generate. This ensures that your optimized content always stays on top of SEO trends. ### How it works: 1. **Keyword Integration**: Specify your target SEO keywords in the Coframe dashboard. 2. **AI-Powered Generation**: Our AI algorithms incorporate these keywords naturally into the generated content variants. 3. **Balanced Optimization**: Coframe strikes a balance between keyword optimization and maintaining natural, engaging copy. 4. **Regular Updates**: As SEO trends change, you can update your target keywords, and Coframe will adapt future variants accordingly. This feature helps you maintain strong SEO performance while benefiting from dynamic content optimization. Continuous content changes can have implications for your website's search engine optimization (SEO), even when it has been optimized for keywords using Coframe. Coframe provides features to mitigate any negative impact on SEO while still allowing for dynamic optimization for conversion rate. ### Serving Original Content to Bots * **Bot Detection**: Coframe can detect requests from known search engine bots (e.g., Googlebot, Bingbot). * **Static Content Delivery**: Serve the original or a specific variant of your content to bots to ensure consistent indexing. ### Enabling Bot-Friendly Mode 1. **Navigate to SEO Settings**: In your project dashboard, go to **Settings** > **SEO Management**. 2. **Enable Bot-Friendly Mode**: Toggle on **Serve Original Content to Bots**. 3. **Select Preferred Variant (Optional)**: If you prefer a specific variant to be indexed, select it from the dropdown menu. 4. **Save Changes**: Click **Save** to apply the settings. ## Best Practices for SEO with Coframe * **Consistency**: Keep key SEO elements like meta tags, headings, and structured data consistent for bots. * **Canonical Tags**: Use canonical tags to indicate the preferred version of a page if duplicates exist. * **Sitemap Updates**: Regularly update your sitemap to reflect any structural changes. * **Monitor Search Console**: Keep an eye on Google Search Console for any crawl errors or indexing issues. ## Frequently Asked Questions When configured properly, Coframe should not negatively impact your SEO. By serving consistent content to search engine bots and incorporating SEO-optimized variants, you can maintain or even improve your rankings. Coframe maintains an up-to-date list of user-agent strings for major search engine bots and uses this to detect crawler requests. Yes, you can specify pages or URL patterns to exclude in the project settings. It's recommended to review and update your SEO keywords monthly, or whenever you notice significant changes in your industry's search trends. # Performance Concerns Source: https://docs.coframe.com/seo-and-performance/performance-concerns Learn how Coframe ensures minimal impact on your website's performance Coframe is designed to optimize your website content dynamically while ensuring minimal impact on performance. We understand that website speed is crucial for user experience and SEO rankings. Here's how we address performance concerns: ## Zero Flicker Experience We hide the page initially and only display it after our JavaScript operations on the frontend are complete. This ensures that users do not experience any flickering or content shifts when the optimized content is applied. ## Minimal Impact on Load Times We measure the performance on many pages where Coframe is deployed, both before and after integration. Our findings show that there's minimal practical impact on performance. We achieve this through: * **Optimized Edge Content Delivery**: Our content is optimized at the edge, reducing latency and ensuring fast delivery to users worldwide. * **Efficient Payloads**: We've minimized our payload sizes and made clever optimizations to reduce the amount of data transferred. ## Flexible Integration Options We offer multiple integration methods to suit your needs: * **Frontend Integration**: The standard method involves adding our JavaScript snippet to your website. This is quick to set up and requires minimal changes to your existing codebase. * **Backend Integration**: For deeper integration, we offer options to integrate at the CMS or server-side level. This can further reduce any potential performance overhead by processing optimizations before the page is sent to the user. ## Continuous Performance Monitoring We continuously monitor performance metrics to ensure that our optimizations do not negatively impact your website's speed. Our team is committed to ongoing improvements and addressing any issues promptly.